In this blog we tell you everything about how to assemble the microscope tool kits from our webshop after purchase. Read with me!
Have you bought a microscope tool kit at Mobileparts.shop, but no idea how to assemble it so you can use it? After reading this article, you will know exactly how to set up your microscope set in four simple steps:
- Attach the eyepieces to the microscope.
- Fix and set the scope camera.
- Attach the ‘Barlow lens’ to the stand.
- Attach the illumination to the microscope head.
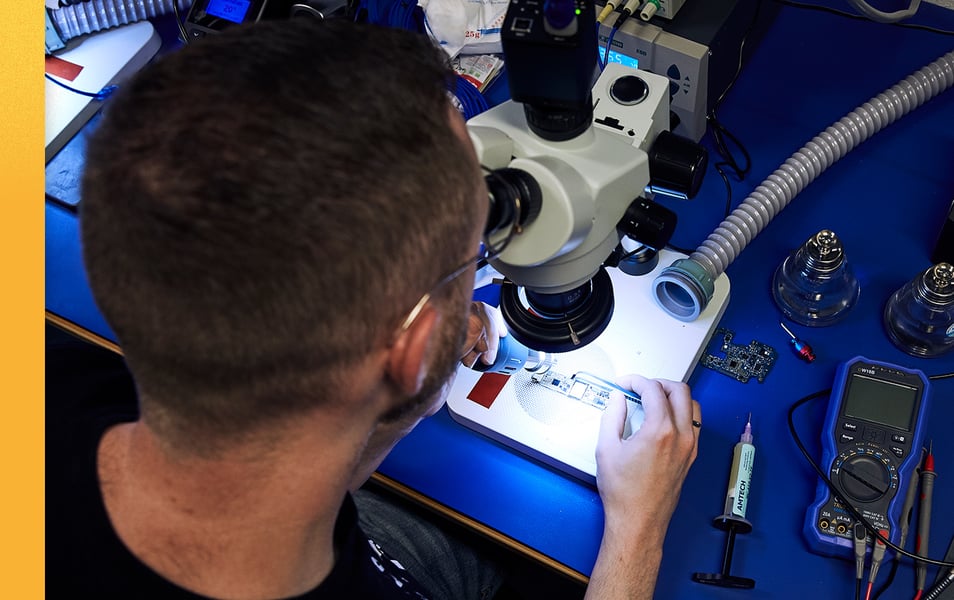
Attaching eyepieces to the microscope
First you attach the eyepieces to the microscope head. You do this by loosening the screw on the head and attaching the eye pieces. Then place the camera on the trinocular port, in the center of the microscope head.
Attaching and setting up the scope camera
A scope camera of 1080p 60fps is supplied with each microscope set. If you want to record in 60fps, connect the power port and the HDMI to your PC. Doesn’t the quality have to be so sharp? Then you can use the USB port on the camera for the webcam effect. The quality is then about 30fps.
Please note! Never use the power and USB output at the same time, as it may cause power fluctuation problems.
Attach the reduction lens to the camera with the supplied adapter ring. This allows you to mount the camera firmly on the head. The camera has all the optical effects to ensure that you get a beautiful and dynamic image. To get the focus of the camera right, you can use the 5mm ‘spacer ring’ and assemble it on the c-mount.
You can set the camera as follows: place your head at a height of 165 millimeters from your working field. Then make the lens equal to the focusing rack and set the optical zoom to half. To get the image really sharply focused, move the eyepieces to the position of your eyes so that you get a sharp image. Turn the top ring, just below the camera, to determine the focus. The rotary knob is the optical zoom. This allows you to zoom in and out on your work field. The zoom goes from 0.7 to 4.5x.
Attaching the barlow lens from the microscope tool kit
After setting up the scope camera, you attach the ‘barlow lens’. This will magnify your image to 0.5x. This is necessary because you are calibrating the microscope head at a certain height from your working field. You have to hold the microscope a bit higher from your working field so that you also have room to aim the hot air gun at your motherboard, for example. With the barlow lens, you can place the microscope head at a height of 165 millimeters and still get a sharp image of your work while also having space.
Attaching the LED lighting to your microscope
The last thing you attach is the light. This light is super bright, so you have a good view at your workplace. There are three screw holes in it, but before you do that, you need to attach the microscope head to the base.
Would you like to know more about the differences between the microscope standards that we offer in our shop? Then read the blog ‘Microscope setup for microsoldering‘. Curious about our range or do you want to order a microscope set directly? Then view the category page ‘Microscope tool kits‘ on our website.

Remco Spreeuwers
CEO/Co-owner of Mobileparts.shop/2Service B.V.